

Set up a webhook
Register your endpoint, turn on signing and choose events. You need an HTTPS URL that accepts POST requests and somewhere safe to keep the signing secret.
Create the webhook
Open the Developer portal and choose Webhooks. If you have none yet, choose Create New Webhooks; otherwise Add new webhook. Setup has three steps.
Enter the connection details
Fill in the connection:
- Webhook Name: a name your team will recognise, such as “Acme purchase invoices”.
- Country: the country whose events you want. One webhook covers one country.
- Environment: Sandbox or Production. You cannot change this later, so create separate webhooks for each.
- Webhook URL: the address that will receive deliveries, such as
https://example.com/webhooks/purchases.
To receive an email when a delivery fails permanently, turn on Email me when deliveries fail. Add up to five recipients, pressing Enter after each address.
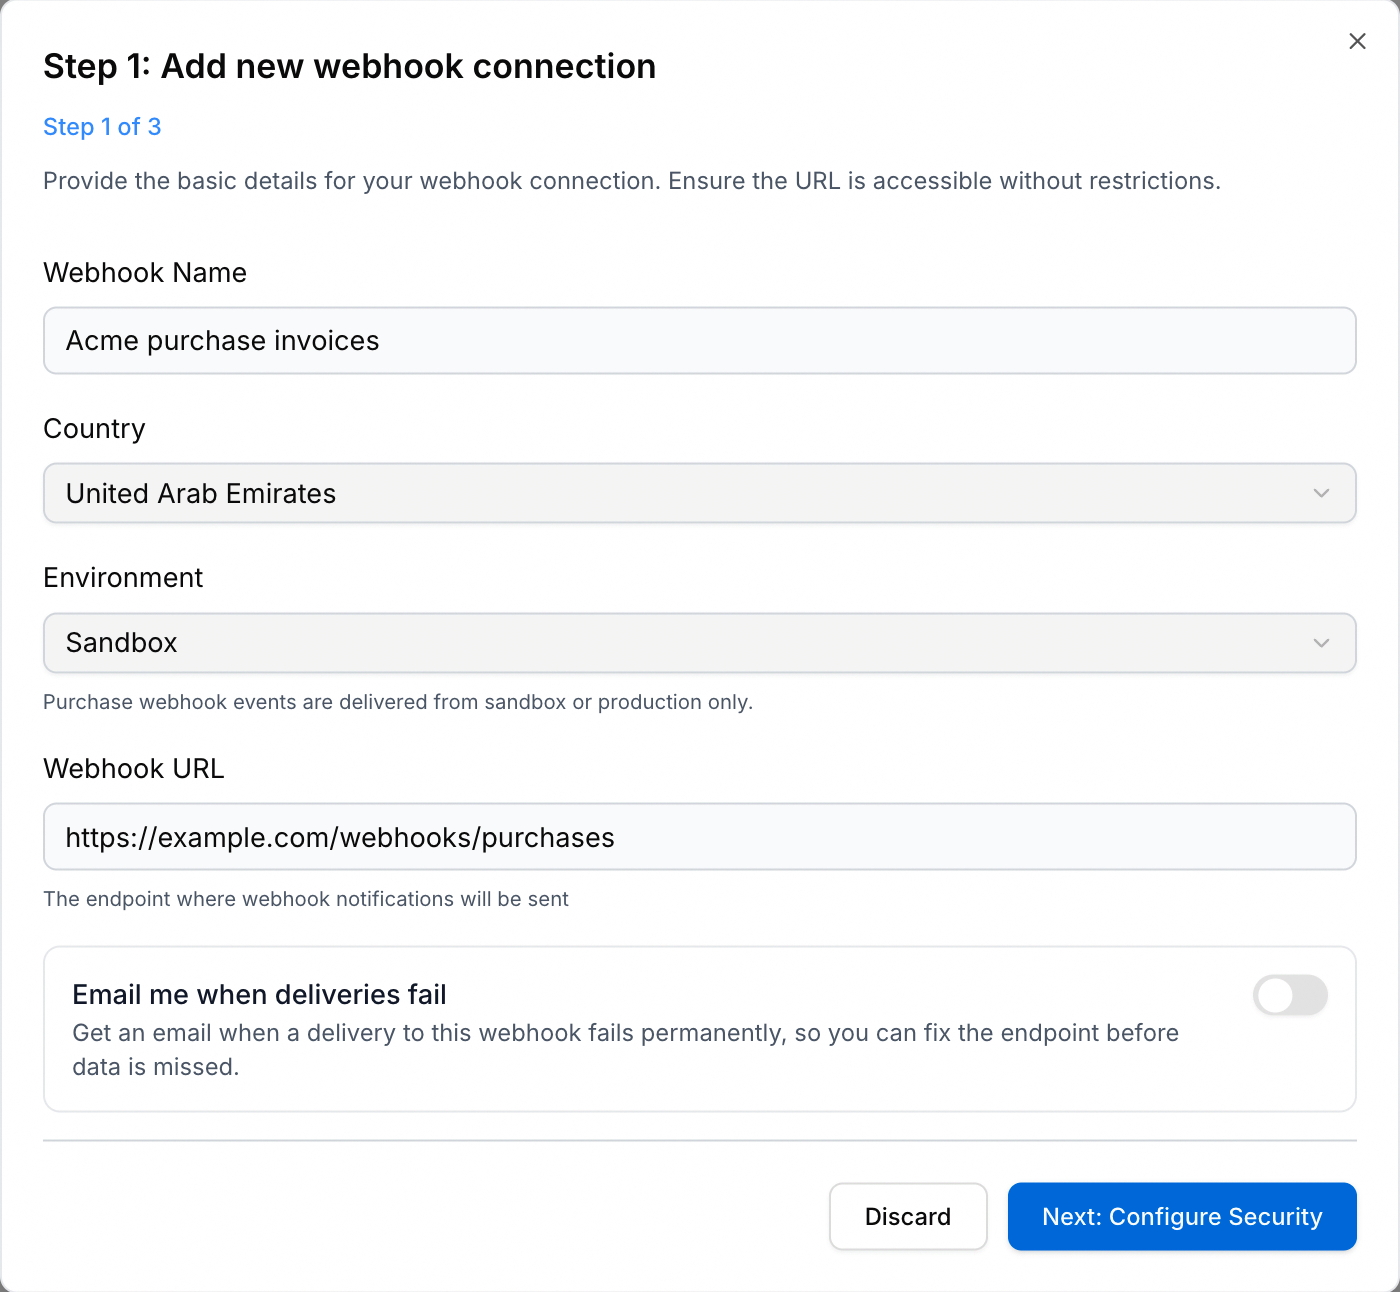
Choose Next: Configure Security. You should see Step 2 of 3.
Turn on signing
Turn on HMAC signing. It lets your endpoint prove each delivery came from Complyance and was not altered.
- Choose an Algorithm.
sha256(SHA-256) is recommended;sha512also works. - Use the generated signing secret, or choose Generate secret for a new one.
- Copy the secret and store it in your secret manager or a server-side environment variable.
- Tick I have copied my signing secret and stored it safely.
The secret is shown only here. If you lose it, open the webhook again and choose Rotate secret, then update your receiver.
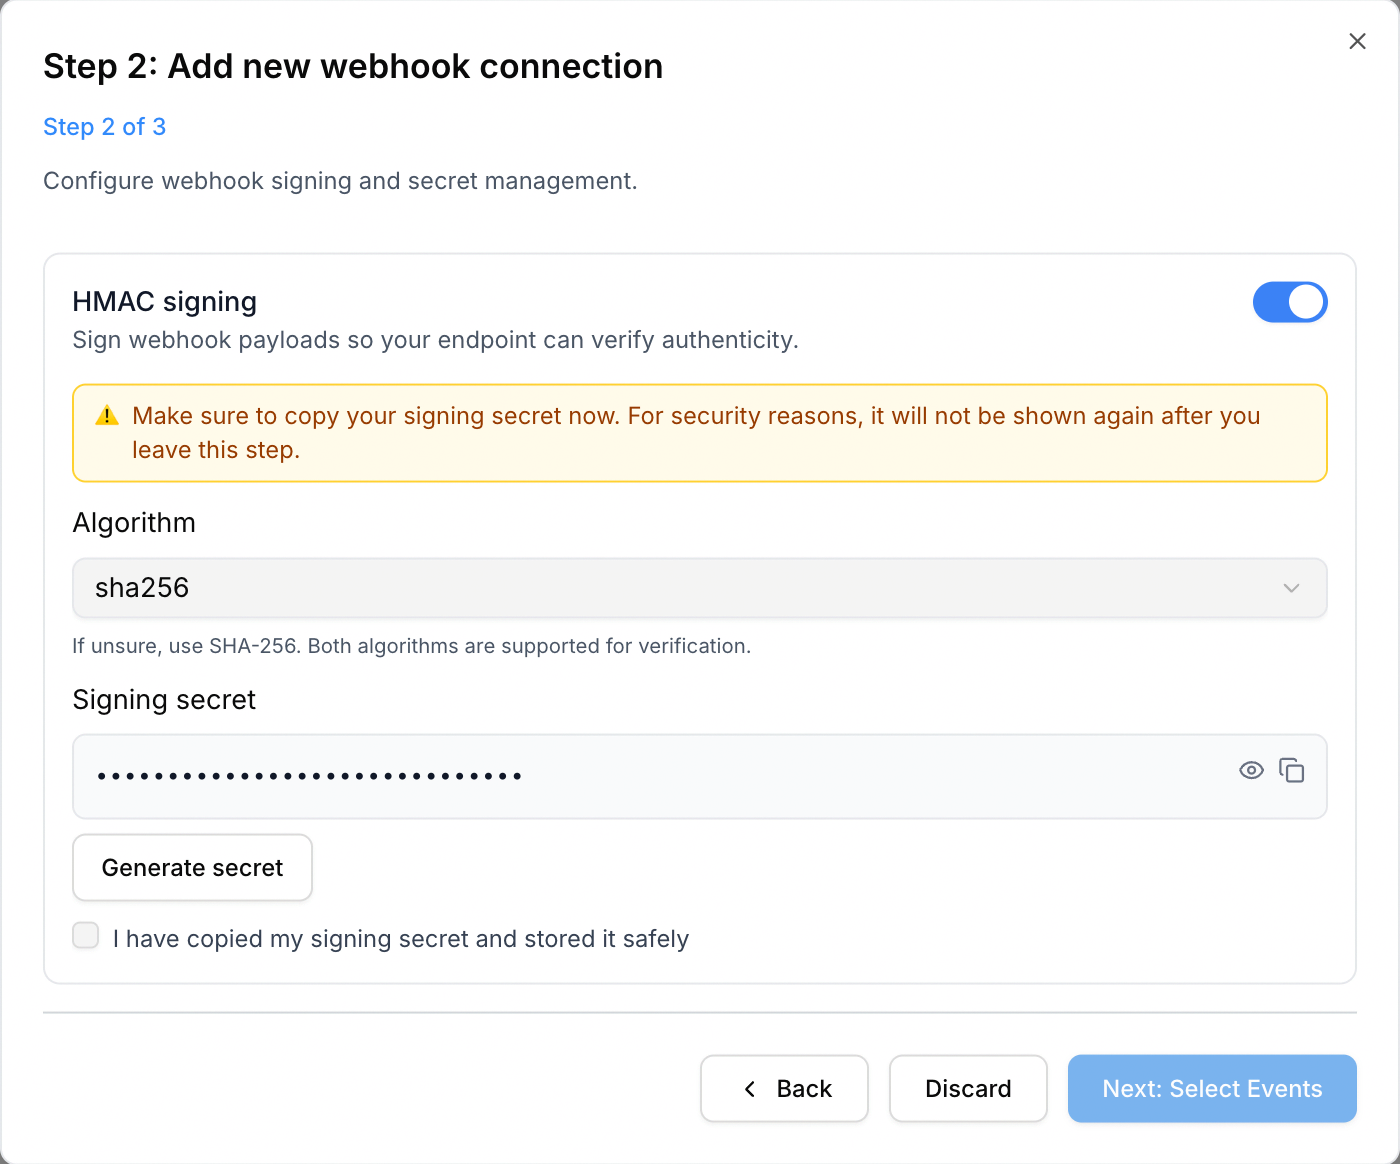
Choose Next: Select Events. You should see Step 3 of 3.
Choose purchase invoice events
Pick the events to send to this endpoint. Search by name, tick individual events, or use Quick Presets. Subscribe only to events your receiver is ready to handle.
For a purchase-invoice integration, open the Invoicing Portal tab, search for purchase and expand Purchase. Choose Purchase invoice stored and Purchase invoice validation failed.
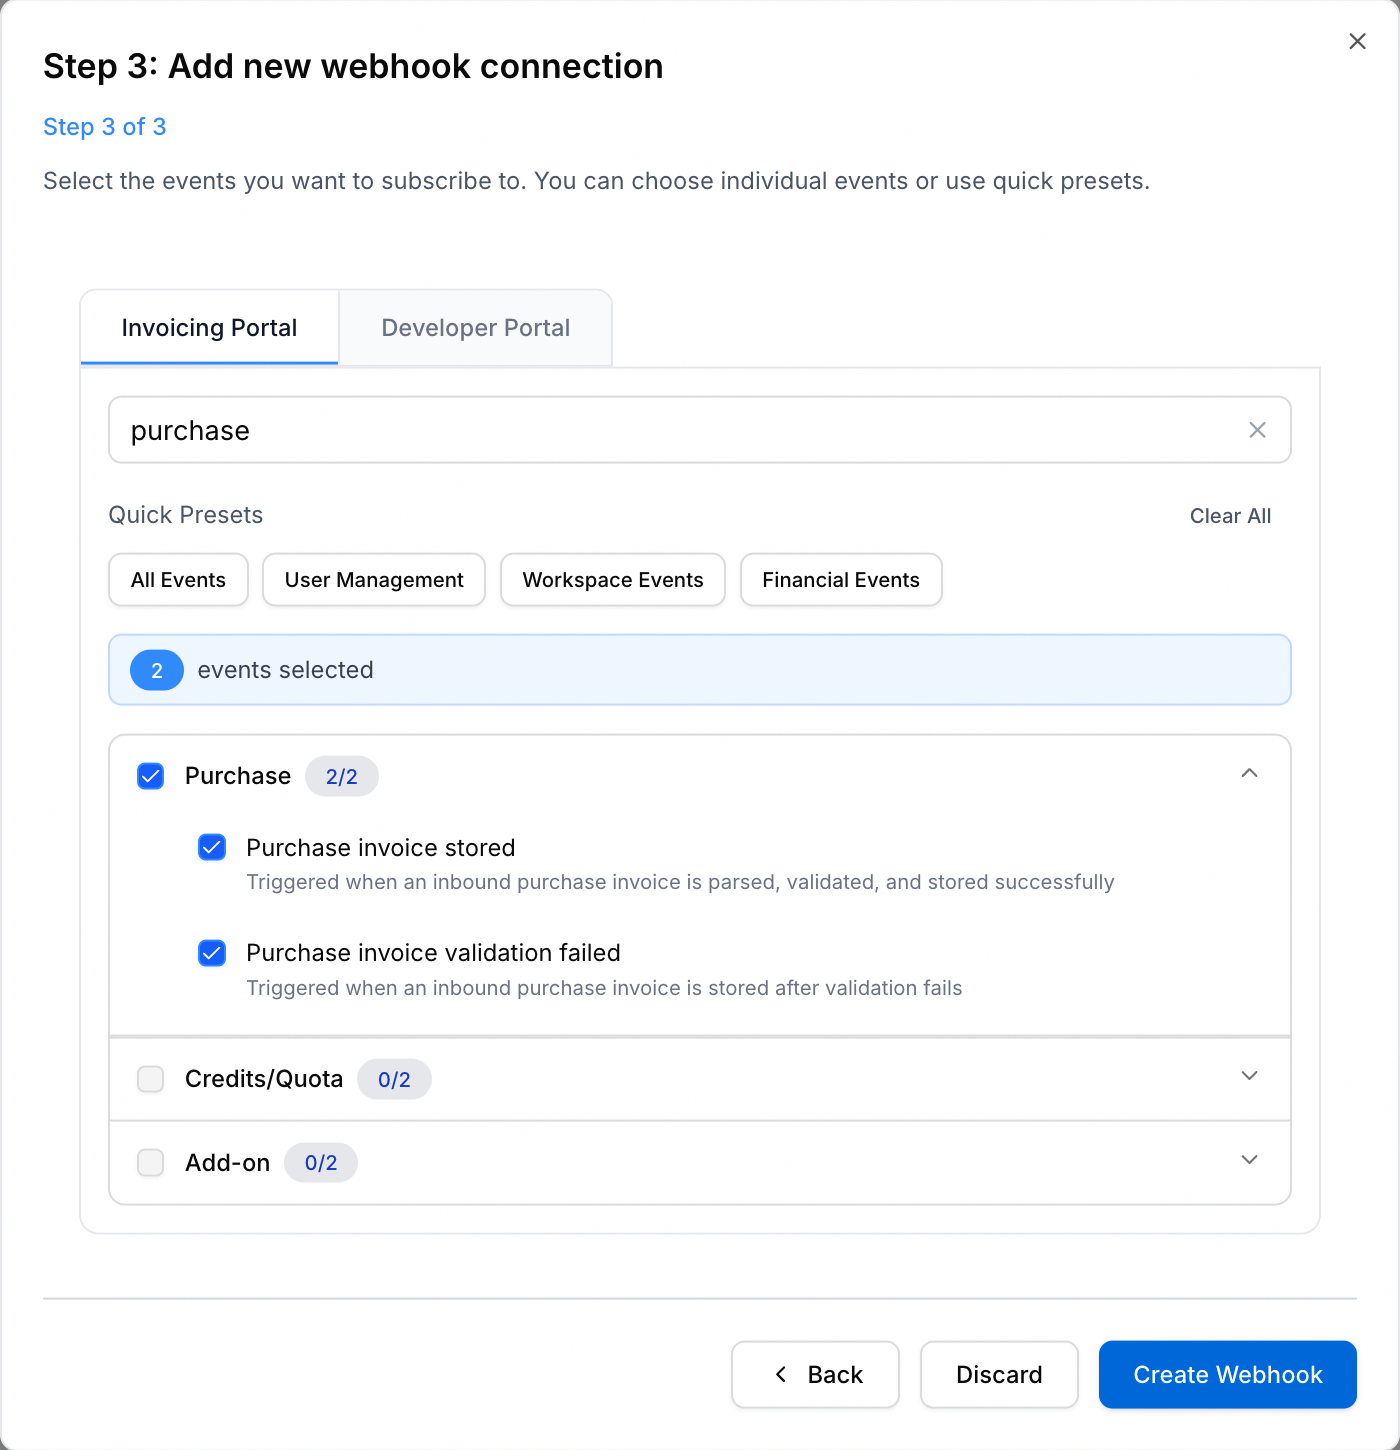
Choose Create Webhook. The webhook appears in the list as Active.
Check your first delivery
Before relying on deliveries, add signature verification to your receiver. Complete a purchase-invoice flow in Sandbox using the same country as your webhook.
Your endpoint should receive a POST with X-Webhook-Event: purchase.invoice.stored, or purchase.invoice.validation_failed if validation fails. Check the signature, save the event and return 200. Creating a webhook alone does not produce a purchase event.
Manage a webhook
Each row in the Webhooks list has these actions:
- Edit: change the name, country, URL, signing settings, failure-email recipients or events. Choose Update Webhook to save. The environment stays fixed.
- Disable and Enable: pause deliveries without deleting the configuration.
- Delete: remove the webhook. This cannot be undone.
Keep the signing secret out of browser code and logs, and rotate it if you think it has been exposed.
If something goes wrong
| What you see | What to do |
|---|---|
Production environment requires an HTTPS webhook URL | Use an https:// endpoint for Production. |
Please confirm you have copied the secret | Copy the signing secret, store it safely and tick the acknowledgement before continuing. |
| No request reaches your endpoint | Check that the webhook is Active, the environment matches your test and the purchase events are selected. Confirm that your endpoint is reachable and the purchase invoice has been stored. |
Next: Payload and delivery.
Last updated