

Create and fix documents
Create an invoice or credit note by hand when it does not arrive from another system. You can also correct a document marked Needs Correction and have it checked again.
Create a document by hand
Use manual creation when an invoice or credit note will not arrive through an integration or file upload. Start from Sales for a document you issue, or Purchases for a document you receive.
Open a blank form
Open Documents, choose Sales or Purchases, then choose Create new document. The Create invoice form opens.
Choose the document profile
Choose the Base document type that matches the document, such as an invoice or credit note. Select a Variant or a Modifier only when it applies to the transaction.
The available choices depend on the selected country. When you change the profile, the form updates the fields it shows.
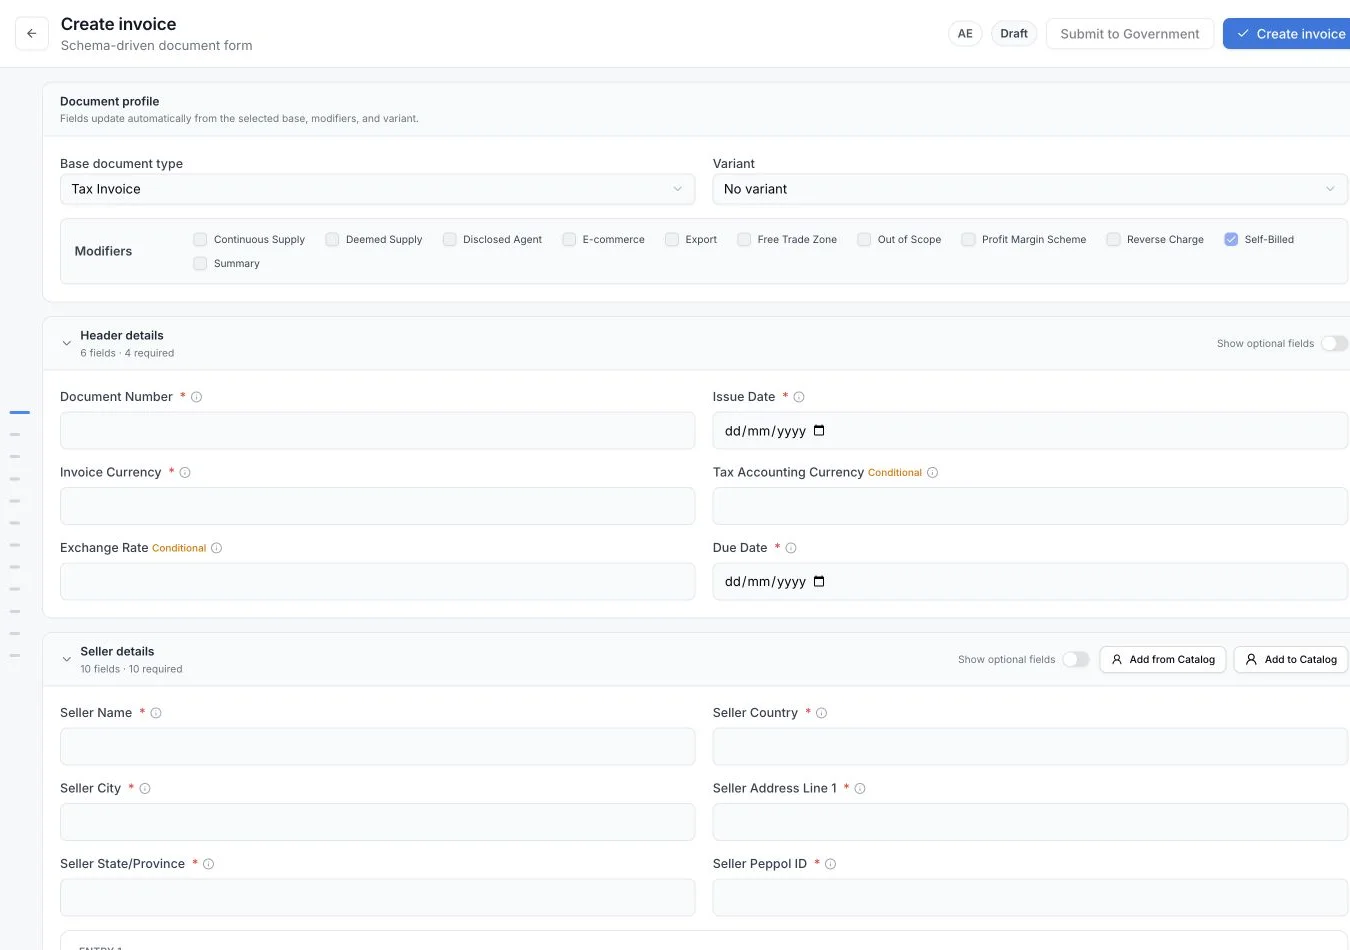
Complete the form
Work through the sections from top to bottom. Depending on the document profile, you may see header, seller, buyer, delivery, line items, payment, allowances and charges, supporting documents, totals, configuration, destinations and country-specific details.
- A star marks a required field.
- Conditional means the field is required only when its condition applies.
- Turn on Show optional fields within a section to see its optional fields.
- Choose Add entry to add another value to a repeating group, such as a line item or tax ID.
The count below each section name shows how many fields it contains and how many are required.
Reuse saved details
The seller, buyer and line item sections let you reuse master data.
- Add from Catalog fills the section from a saved record.
- Add to Catalog saves the details you entered as a new record. The record ID is required.
You can manage these records in Masters.
Create and validate the document
Choose Create invoice. The document is saved and checked.
If the checks pass, the status changes to Ready. Choose Submit to Government when the button becomes available and you are ready to send the document. The status changes to Processing while the submission is handled.
If the document is marked Needs Correction, open its validation issues and follow the correction steps below.
Fix a document marked Needs Correction
A document marked Needs Correction has at least one problem to resolve before it can move on.
Open the document
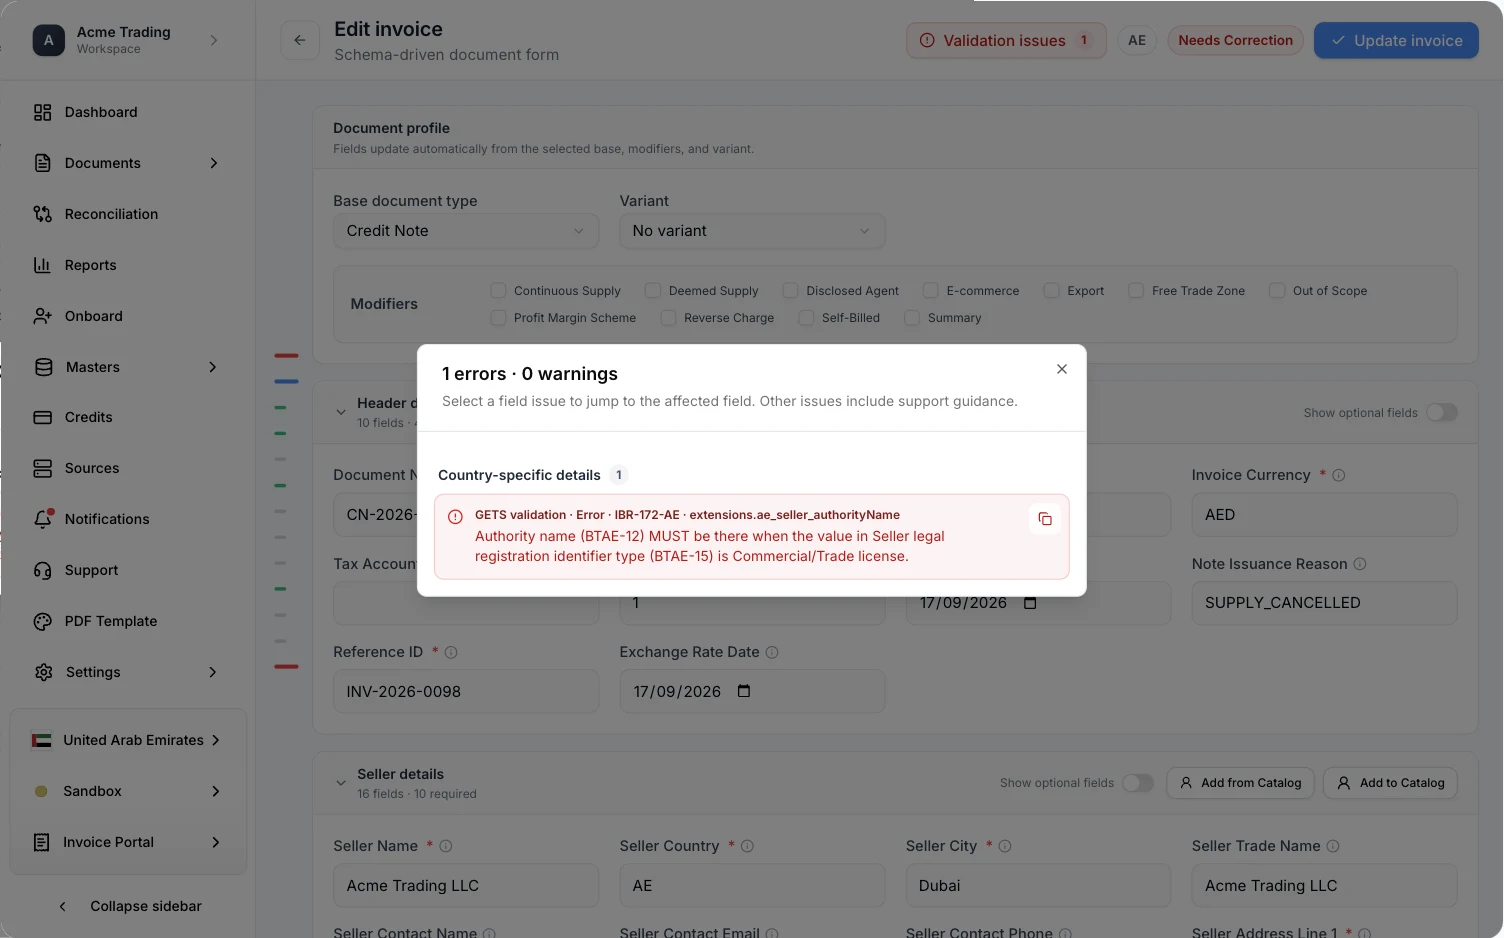
Open Documents and choose the document number in a row marked Needs Correction. The Edit invoice screen opens with the document status and the number of issues at the top.
Read the validation issues
Choose Validation issues. Each issue shows the check that failed, the field it concerns and what needs attention.
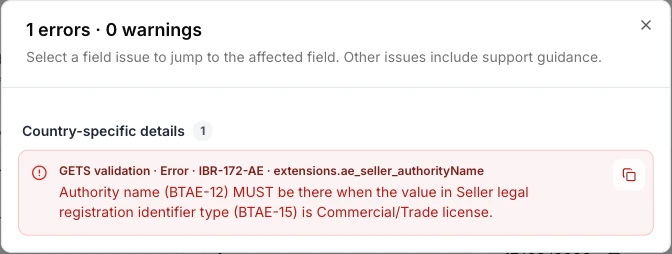
Select a field issue to move to the affected field. To share the exact issue with support, use the copy button beside it. Include the rule ID, such as IBR-172-AE, so support can identify the failed check.
Correct the fields
Update every field listed in the issues panel. Required, conditional and optional fields work the same way as they do during manual creation.
Validate the document again
Choose Update invoice. The document is saved and checked again. If there are more issues, the updated list appears. When all checks pass, the document moves on from Needs Correction.
Last updated