

Upload invoice documents
Upload an Excel or CSV file to import several invoices and review the results together. You need access to the Invoice Portal and a file prepared for the country and environment you select.
Upload a workbook
Use an upload when your invoices are already in a spreadsheet and you want to work through a batch in the Invoice Portal.
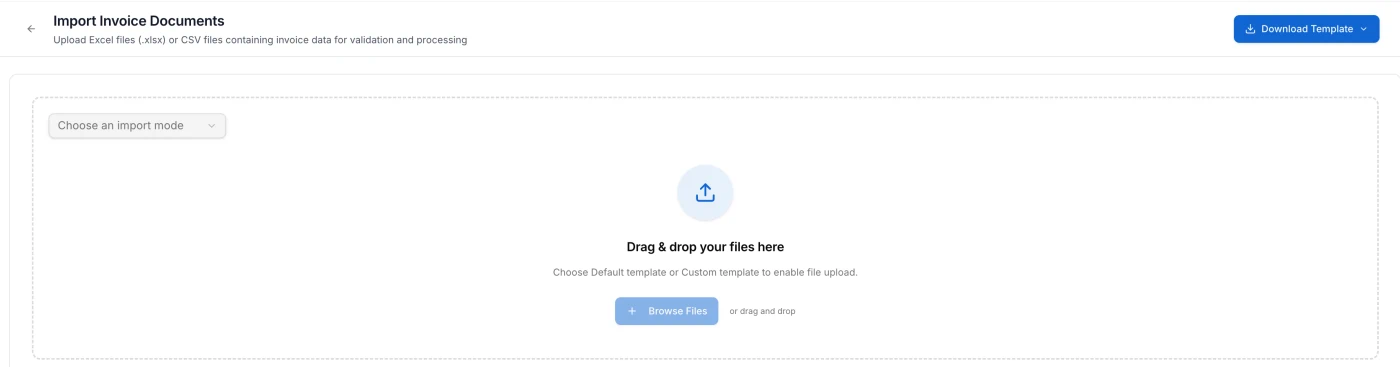
Open the import screen
- In Invoice Portal, open Documents and then Sales.
- Choose Upload new document(s). The Import Invoice Documents screen opens.
Choose a template
Choose Default template under Choose an import mode if you can fill in the standard columns. Choose Download Template → Default template to get the workbook for the selected country. It includes every supported column. Fill in the columns your invoices need and keep its headings.
You can make a smaller workbook with Download Template → Template Builder: select the document types and scenarios, choose optional fields, then choose Preview and export and Generate template. Required fields stay selected. Fill in the downloaded workbook and upload it in Default template mode.
If your file uses your own headings, choose Custom template instead. Map those headings to invoice fields in an active Excel integration before you upload. Every non-empty row must include the same source name and source version.
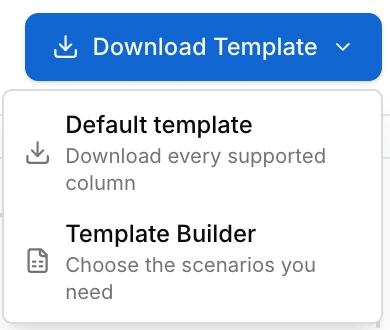
The available modes and template choices depend on the selected country and environment. If Custom template or Template Builder is unavailable, download and use the default workbook for your current selection.
Select and upload files
If Invoice generation unit (EGS) appears, select an EGS before choosing files.
Choose Browse Files or drag files into the upload area. Check Selected Files, then choose the upload button showing the number of files you selected.
Default template accepts .xlsx, .xls and .csv, with each file up to 10 MB. The screen shows how many files you can select for one upload. A total upload size limit also applies; if the upload exceeds it, reduce the number or size of files as the error message directs. Custom template accepts one .xlsx workbook up to 10 MiB.
If Files uploaded successfully appears in Default template mode, choose the process button showing the number of uploaded files to open the review. Some country and environment selections return you directly to Sales after a successful upload; follow those invoices there instead. In Custom template mode, the review opens after the workbook uploads.
Review the invoices
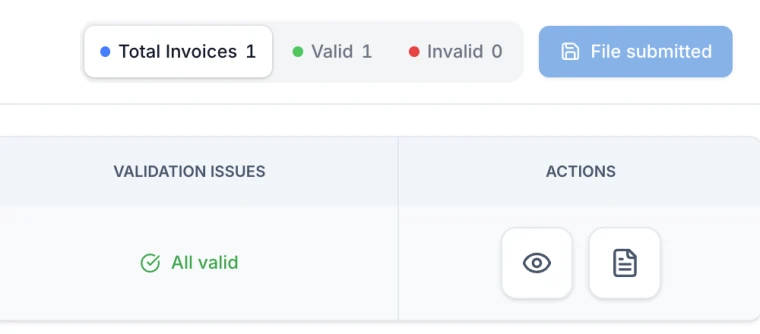
The review shows the invoices found in the workbook and any issues that need attention. Correct editable values and choose Validate when it is shown. For a custom workbook, Source issues to fix identifies source values or setup problems that need attention. Affected documents remain read-only until those issues are resolved.
When invoices are ready, choose Submit to Government, or select ready invoices and choose Submit Selected with the selected count. Check the authority and environment in the confirmation dialog before confirming. Once submitted, documents cannot be edited or recalled. File submitted marks a submitted file; it does not confirm acceptance by the authority.
Follow an upload in import history
Return to Import Invoice Documents with the same country and environment selected and find the file in Import history. The table shows its File name, Upload date, Upload time, Documents count and Status. You may see Processing, Completed, Rejected, Failed or Deleted. Select a linked file name to reopen its review; not every upload has a review link. Choose Download file in Actions to get the uploaded file.

The import status describes the file. To check whether an individual invoice is valid or delivered, open it from Documents.
If something goes wrong
| What you see | What to do |
|---|---|
| Choose Default template or Custom template to enable file upload. | Choose an import mode before selecting files. |
| Upload Issues Found, with a file type or size message | Use a supported file type and the limit shown on the screen. In Custom template mode, select one .xlsx workbook. |
| Excel integration mapping required after a custom upload | Complete and activate the Excel integration for the workbook’s source, country and document type. Then upload the workbook again. |
If an invoice has validation issues after import, open it in the review and correct the fields shown there. See Create and fix documents for how to read validation issues.
Last updated